Injection molding and 3D printing are the two most common manufacturing methods for plastic parts, but they serve fundamentally different purposes. Buyers and engineers frequently ask which one to use for their project — and the answer depends on volume, cost, material, and timeline. This guide compares injection molding vs 3D printing across every key factor so you can make the right choice.
The Basic Difference
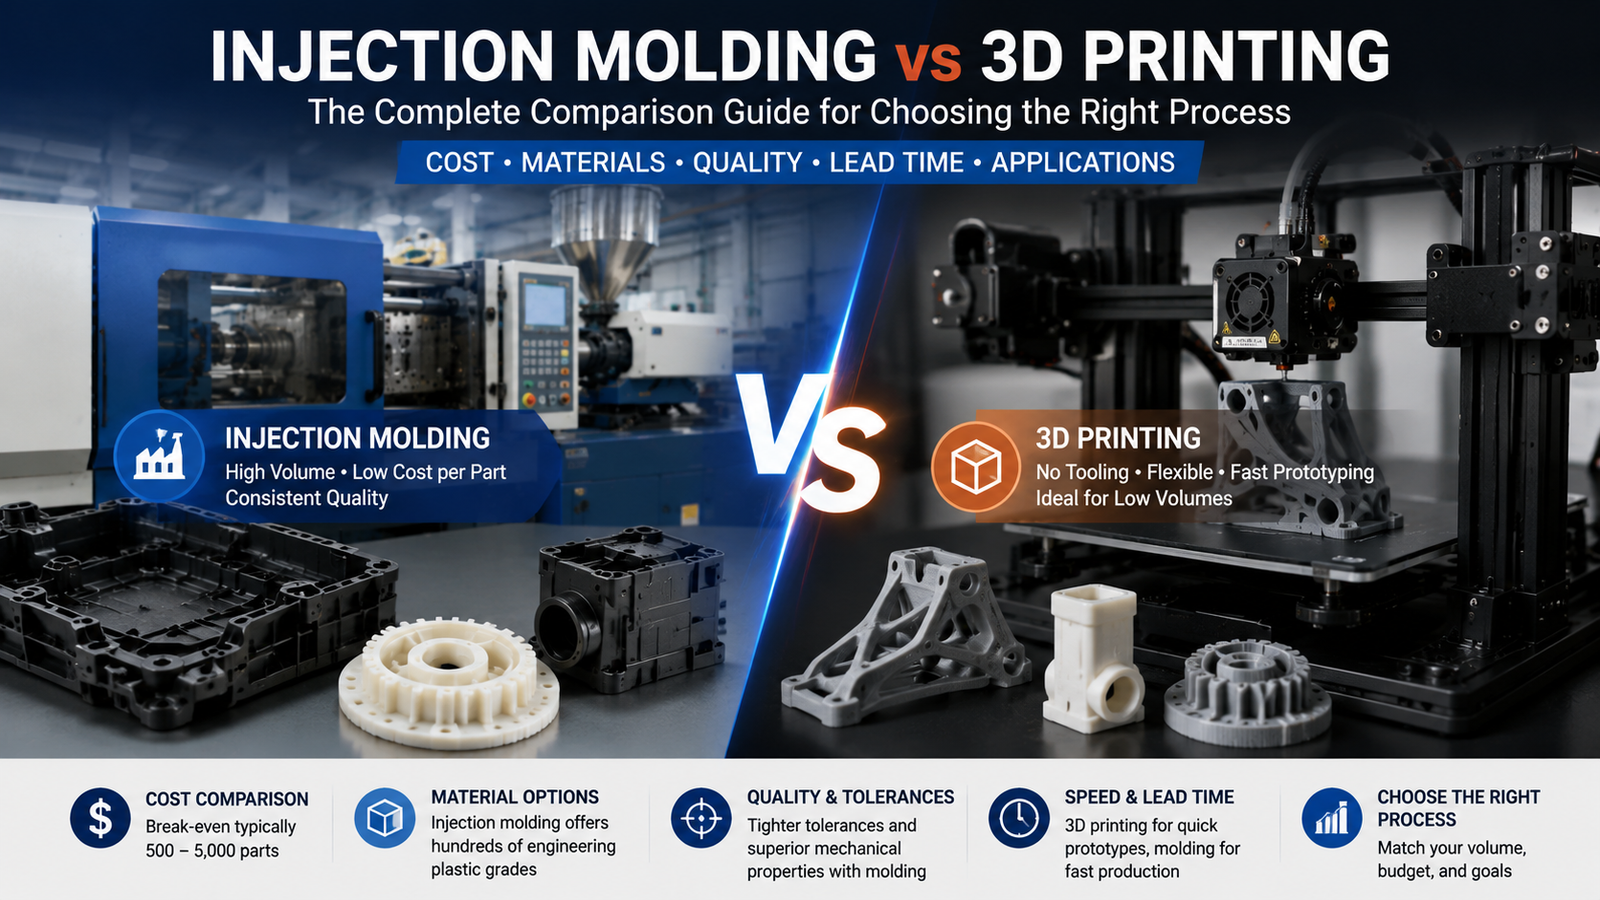
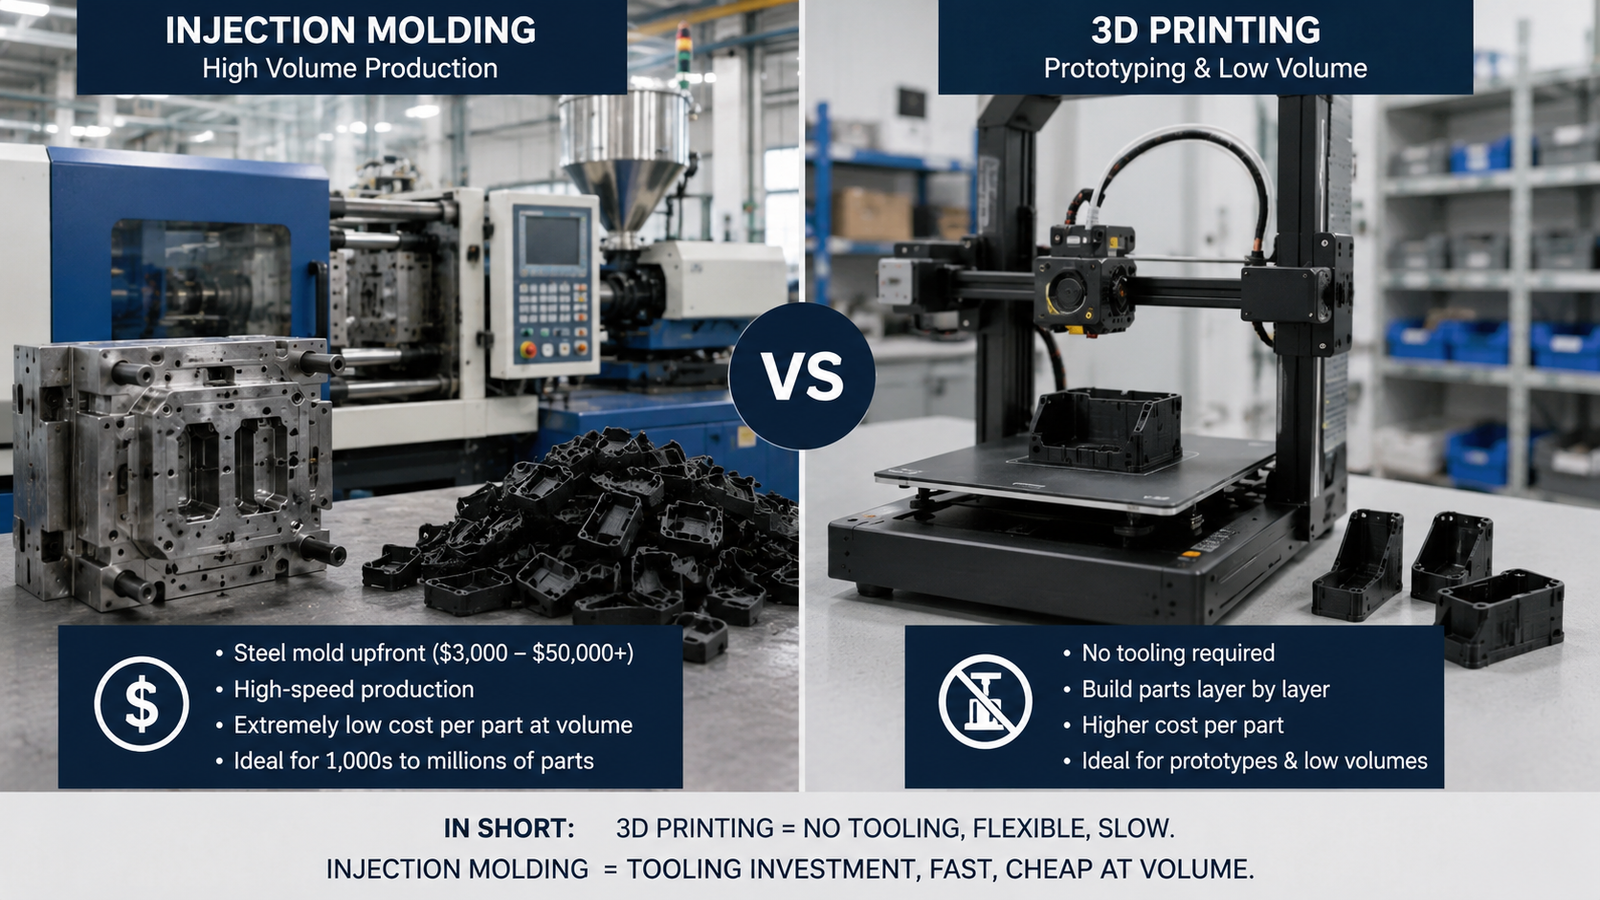
Injection molding is a mass-production process: molten plastic is injected into a steel mold under high pressure, producing identical parts at high speed. The upfront cost is a mold (typically $3,000-$50,000+), but once built, parts cost pennies each.
3D printing (additive manufacturing) builds parts layer by layer directly from a digital file, with no tooling. Each part costs roughly the same to make, but there is no upfront tooling investment — ideal for prototypes and low volumes.
In short: 3D printing = no tooling, flexible, slow. Injection molding = tooling investment, fast, cheap at volume.
Cost Comparison
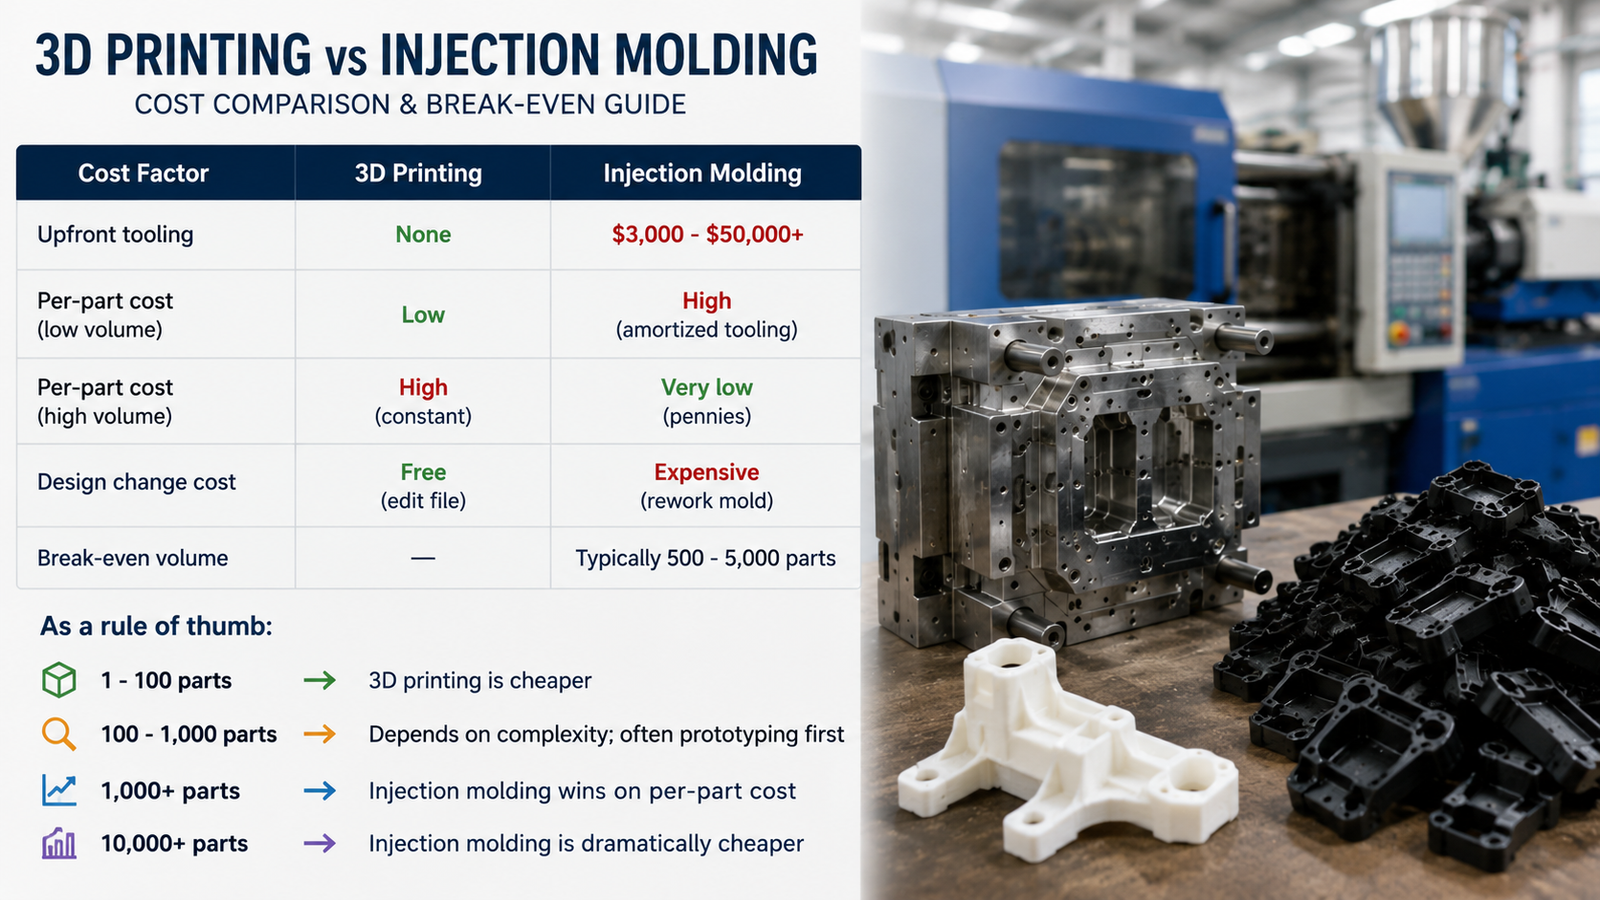
Cost is usually the deciding factor. The crossover point depends on part complexity, but a general rule applies:
| Cost Factor | 3D Printing | Injection Molding |
|---|---|---|
| Upfront tooling | None | $3,000-$50,000+ |
| Per-part cost (low volume) | Low | High (amortized tooling) |
| Per-part cost (high volume) | High (constant) | Very low (pennies) |
| Design change cost | Free (edit file) | Expensive (rework mold) |
| Break-even volume | — | Typically 500-5,000 parts |
As a rule of thumb:
- 1-100 parts → 3D printing is cheaper
- 100-1,000 parts → depends on complexity; often prototyping first
- 1,000+ parts → injection molding wins on per-part cost
- 10,000+ parts → injection molding is dramatically cheaper
Material Comparison
The material options differ significantly between the two processes:
| Material Aspect | 3D Printing | Injection Molding |
|---|---|---|
| Material range | Limited (specific to printer type) | Extremely wide (hundreds of grades) |
| Engineering plastics | Limited (some PA, PC, PEEK) | Full range (PA66, POM, LCP, PPS...) |
| Glass-filled grades | Limited | Standard (GF30, GF50) |
| Material strength | Lower (layer lines) | Higher (solid, isotropic) |
| Flame-retardant grades | Rare | Standard (UL94 V0) |
| Food/medical grades | Some | Full certification options |
Injection molding offers access to the full spectrum of engineering plastics — glass-reinforced, flame-retardant, high-temperature, and certified medical/food grades. 3D printing is limited to the materials compatible with the specific printing technology (FDM, SLA, SLS).
Mechanical Properties and Quality
Injection molded parts are stronger and more consistent because the material is solid and isotropic — no layer lines, no weak axes:
| Property | 3D Printed | Injection Molded |
|---|---|---|
| Strength | 60-90% of molded (varies by axis) | 100% (reference) |
| Layer lines | Visible, stress concentrators | None |
| Surface finish | Rough (FDM) to smooth (SLA) | Molded finish (smooth) |
| Tolerances | ±0.1-0.3 mm (varies) | ±0.02-0.05 mm |
| Consistency | Part-to-part variation | Excellent (identical parts) |
| Water tightness | May leak (layer lines) | Water-tight |
For functional production parts requiring tight tolerances, smooth surfaces, or pressure sealing, injection molding is the superior process.
Speed and Lead Time
| Stage | 3D Printing | Injection Molding |
|---|---|---|
| First part | Hours to days | 2-6 weeks (tooling) |
| Prototype iterations | Hours | Weeks (mold changes) |
| Production speed | Slow (hours per part) | Seconds per part |
| 10,000 parts lead time | Weeks to months | Days |
| Design changes | Instant, free | Slow, costly |
3D printing wins on getting the first part fast. Injection molding wins on getting the 10,000th part fast.
When to Use 3D Printing
- Prototyping: Validate design, form, fit, and function before tooling
- Low volume: 1-100 parts for testing, samples, or short runs
- Complex geometry: Internal channels, lattice structures impossible to mold
- Custom/short-run parts: Replacement parts, custom tooling, jigs and fixtures
- Rapid iteration: Multiple design versions in a single day
Many manufacturers use 3D printing for rapid prototyping before committing to injection molding tooling — the classic combination workflow.
When to Use Injection Molding
- Mass production: 1,000+ parts, especially 10,000+
- Engineering materials: Glass-filled, flame-retardant, high-temperature grades
- Tight tolerances: ±0.02-0.05 mm requirements
- Consistent quality: Identical parts across millions of cycles
- Lower per-part cost: Economies of scale
- Certified applications: Automotive (IATF), medical, food contact
The Combined Workflow
The best practice for most product development is to use both:
- 3D print prototypes to validate design and function
- Injection mold the final production parts
- Use rapid tooling (soft molds) for pilot runs of 100-1,000 parts
- Scale to full production tooling once design is frozen
This approach minimizes risk and cost while accelerating time to market.
Conclusion
3D printing and injection molding are complementary, not competing, technologies. 3D printing is the right choice for prototypes, low volumes, and complex geometries. Injection molding is the right choice for production volumes, engineering materials, and tight tolerances. The crossover typically occurs around 500-5,000 parts, and the best product development strategy uses both in sequence.
With experience in both rapid prototyping and production injection molding, PlasticXperts helps customers move from prototype to mass production efficiently. Contact our engineering team to discuss your project and receive a recommendation on the right manufacturing approach.
FAQ
Which is cheaper, 3D printing or injection molding?
For low volumes (1-100 parts), 3D printing is cheaper because there is no tooling cost. For high volumes (1,000+ parts), injection molding is dramatically cheaper per part. The crossover point typically falls between 500 and 5,000 parts depending on part complexity and material.
How long does injection molding tooling take?
Standard injection molding tooling typically takes 2-6 weeks for simple to moderate molds, and 6-10 weeks for complex, multi-cavity, or high-precision molds. Rapid tooling (soft molds) can produce pilot parts in 1-2 weeks. 3D printing produces first parts in hours to days.
Can 3D printed parts be as strong as injection molded parts?
No. 3D printed parts are typically 10-40% weaker than injection molded parts because layer lines create weak points and the material is not fully isotropic. Injection molded parts are solid and uniform, achieving full material strength.
What is the break-even point between 3D printing and injection molding?
The break-even point is typically 500-5,000 parts. Below this volume, 3D printing (or rapid tooling) is usually more economical. Above it, the injection molding tooling investment is recovered by the much lower per-part cost. Complex parts with expensive molds shift the break-even point higher.
Is injection molding better than 3D printing for production?
For mass production, yes. Injection molding delivers lower per-part cost, faster cycle times, stronger parts, tighter tolerances, and a wider range of engineering materials. 3D printing remains the better choice for prototyping, low volumes, and complex geometries.
Can I use 3D printing for prototyping before injection molding?
Yes — this is the industry-standard workflow. 3D printing validates the design, form, fit, and function before investing in tooling. Once the design is confirmed, injection molding tooling is built for production. This saves significant time and money by catching design issues early.