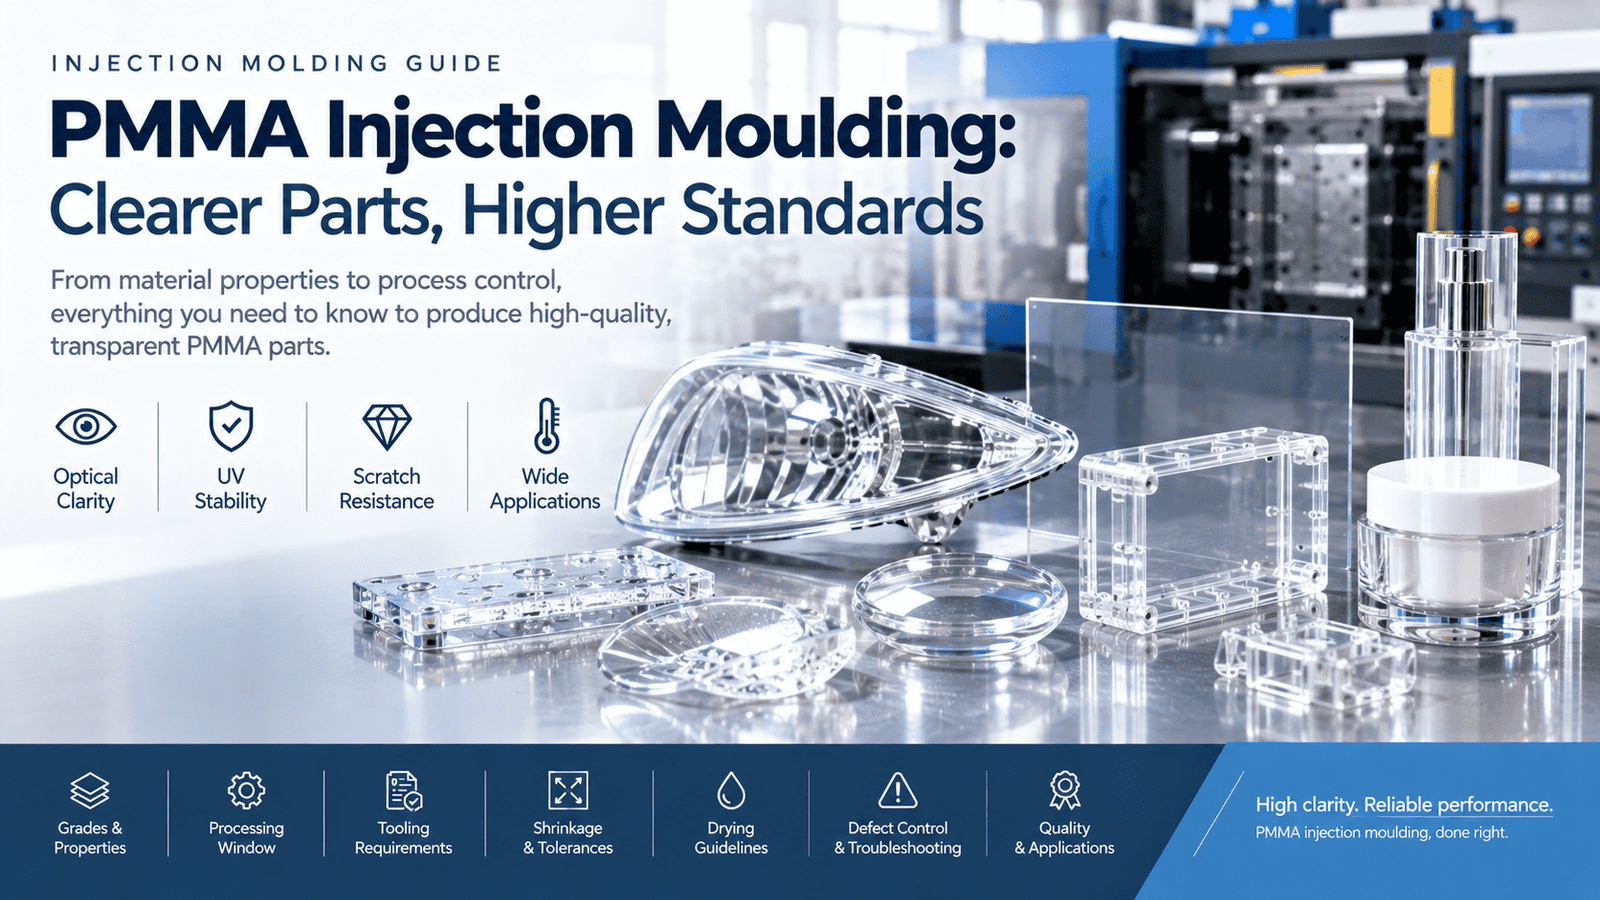
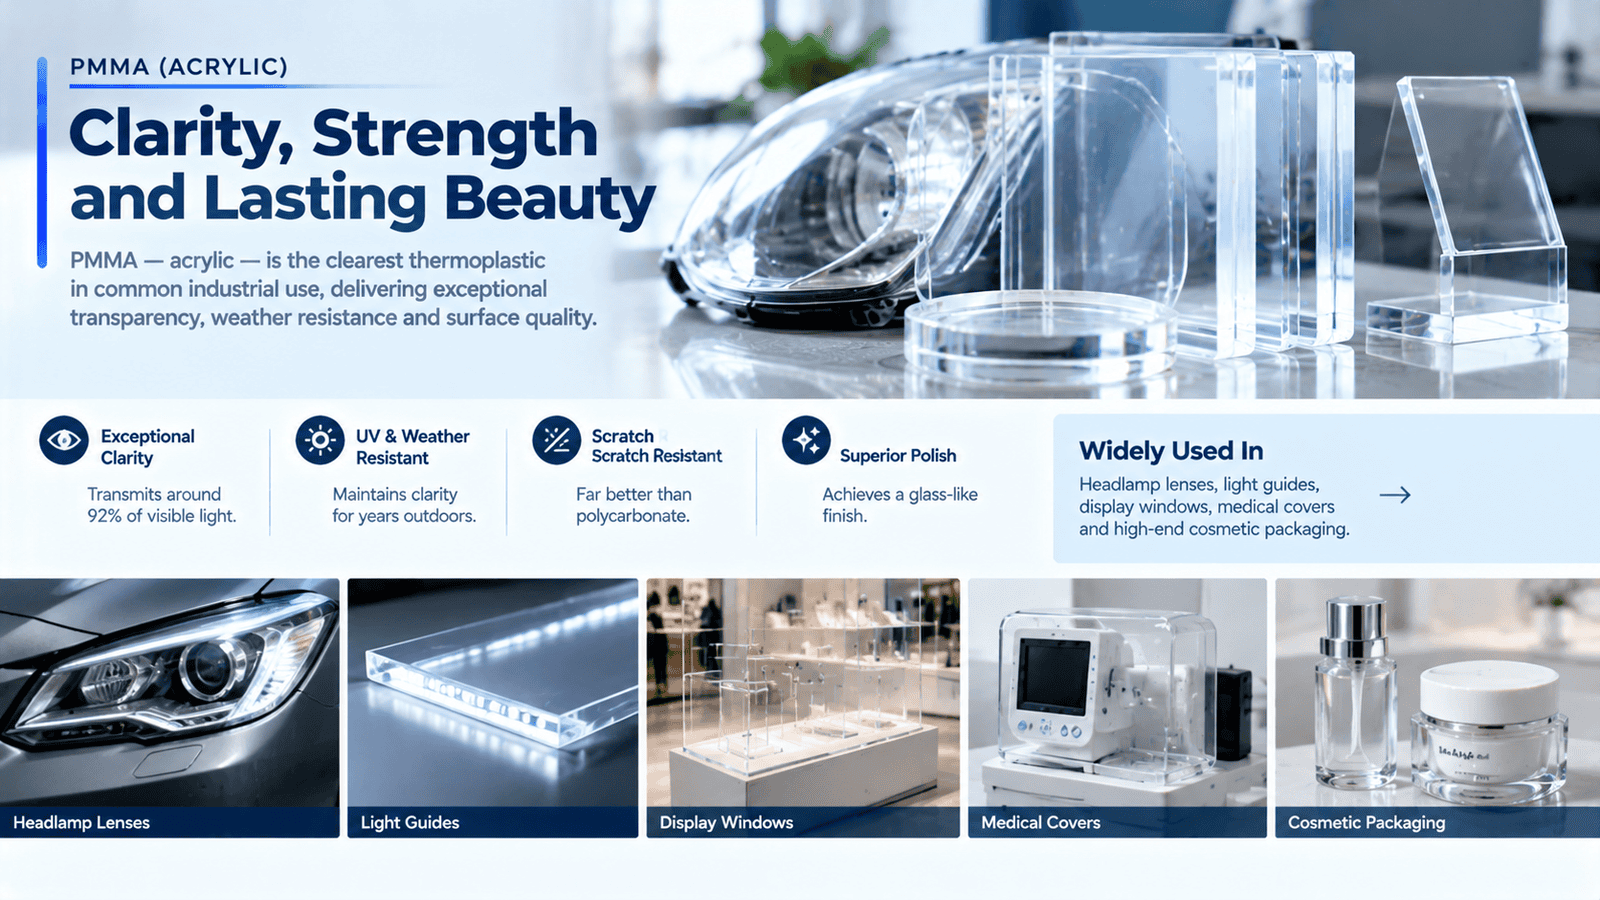
PMMA — acrylic — is the clearest thermoplastic in common industrial use. It transmits around 92 percent of visible light, holds that clarity for years outdoors, resists scratching far better than polycarbonate, and takes a polish that glass would be proud of. It is the material behind headlamp lenses, light guides, display windows, medical covers and high-end cosmetic packaging — the reason it is called the queen of plastics.
It is also brittle, moisture sensitive and completely unforgiving of process drift. A single wet pellet produces a visible silver streak; twenty degrees of excess melt temperature yellows the part; a tool polished to the wrong standard scatters light that should pass straight through. In PMMA, clarity is not a property you specify — it is a result you have to hold on every shot.
Why PMMA Is Specified
| Property | Typical value | What it does for the part |
|---|---|---|
| Light transmission | About 92 percent | The highest of any common mouldable thermoplastic |
| Refractive index | About 1.49 | Close to glass, which is why PMMA lenses can replace glass optics |
| Density | About 1.18 g per cubic centimetre | Lightweight replacement for glass in lenses and covers |
| Heat deflection temperature | 80 to 100 °C at 1.82 MPa | Adequate for lighting, displays and interior automotive use |
| Tensile strength | Around 70 MPa | Stiff and dimensionally stable, but not tough |
| Impact | Brittle, notch sensitive | The main limitation — PMMA cracks, it does not bend |
| UV stability | Excellent | Does not yellow outdoors the way PS or unstabilised PC can |
| Scratch resistance | Good | Noticeably better than polycarbonate |
| Surface finish | Takes an SPI A1 polish | The reason it is used for optical and cosmetic parts |
| Bonding | Solvent bonding works well | Assemblies can be joined without adhesives |
The trade-off is simple: PMMA gives you optical quality that no other mouldable plastic matches, at the cost of impact strength. Almost every PMMA design question comes back to whether the part will be hit.
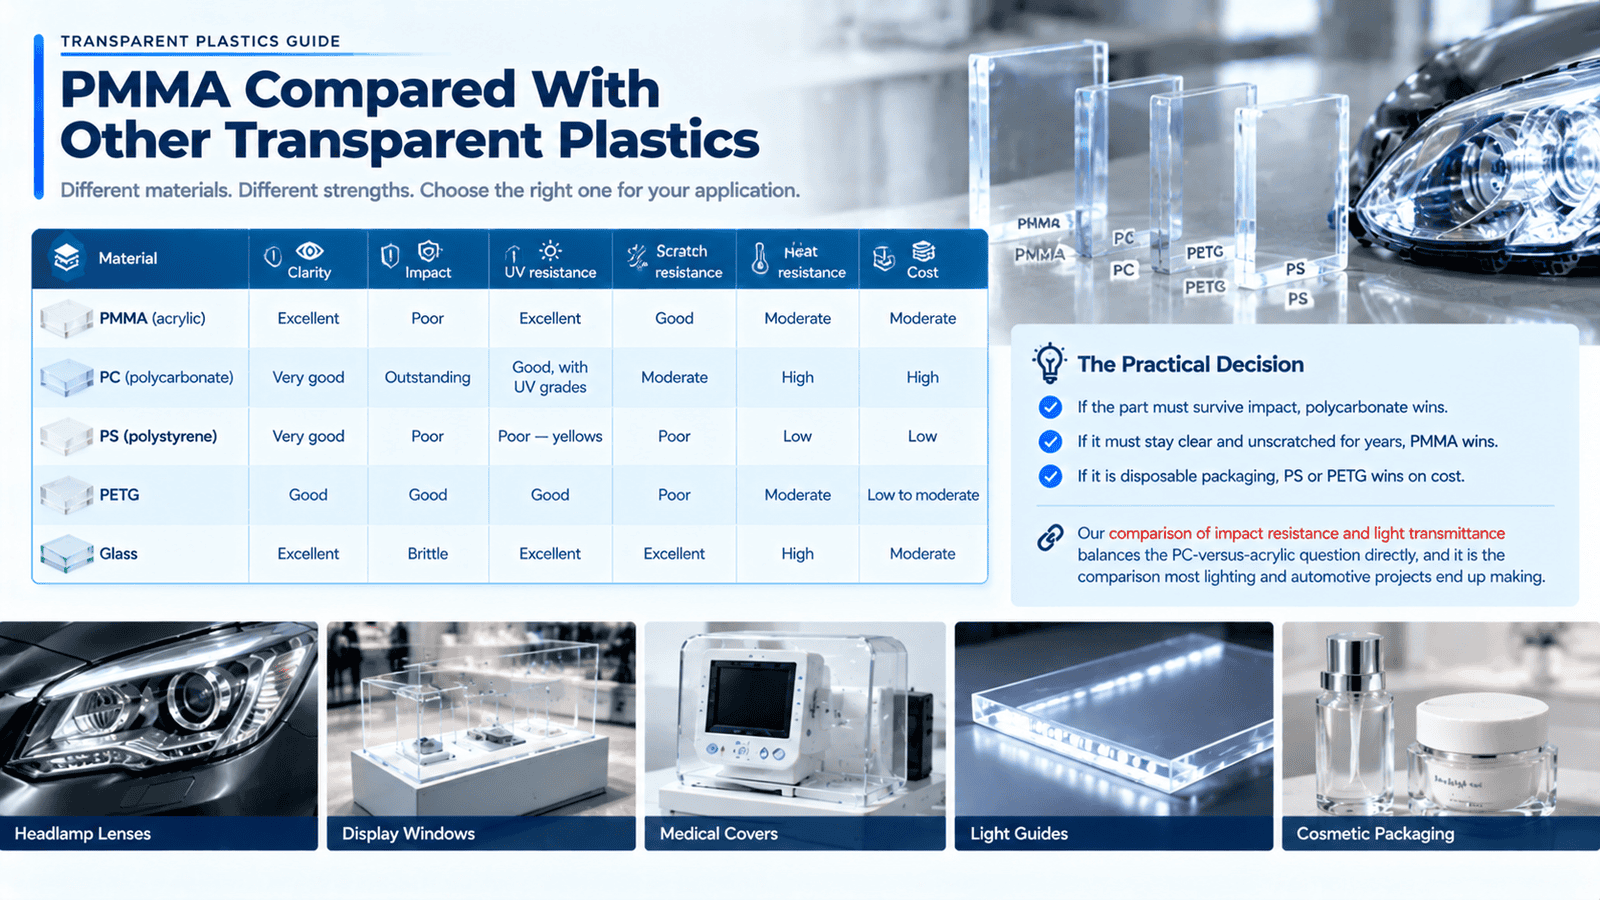
PMMA Compared With Other Transparent Plastics
| Material | Clarity | Impact | UV resistance | Scratch resistance | Heat resistance | Cost |
|---|---|---|---|---|---|---|
| PMMA (acrylic) | Excellent | Poor | Excellent | Good | Moderate | Moderate |
| PC (polycarbonate) | Very good | Outstanding | Good, with UV grades | Moderate | High | High |
| PS (polystyrene) | Very good | Poor | Poor — yellows | Poor | Low | Low |
| PETG | Good | Good | Good | Poor | Moderate | Low to moderate |
| Glass | Excellent | Brittle | Excellent | Excellent | High | Moderate |
The practical decision: if the part must survive impact, polycarbonate wins; if it must stay clear and unscratched for years, PMMA wins; if it is disposable packaging, PS or PETG wins on cost. Our comparison of impact resistance and light transmittance balances the PC-versus-acrylic question directly, and it is the comparison most lighting and automotive projects end up making.
PMMA Grades and What Each One Buys You
| Grade | What it adds | Typical use |
|---|---|---|
| Optical grade | Highest transmission, lowest haze, tightest colour control | Lenses, light guides, camera covers |
| General purpose | Standard clarity and flow | Display windows, covers, general transparent parts |
| Impact modified | Better toughness at some cost in clarity | Housings that may be dropped |
| High heat | Higher heat deflection temperature | Automotive interior and lighting applications |
| UV stabilised | Long-term outdoor colour stability | Exterior lenses, signage, outdoor covers |
| Light diffusing | Controlled haze for uniform illumination | LED panels, diffusers, backlighting |
| Food contact and medical | Compliance documentation | Medical covers, packaging, diagnostic parts |
Optical grade is not marketing language: it means a specified transmission and haze, controlled colour, and a supplier who will defend those numbers on a certificate. Two "clear" PMMA grades can look identical to the eye and behave very differently in a lens.
Drying: The Single Biggest Cause of Scrap
PMMA absorbs moisture, and moisture in the melt turns into visible defects. The silver streaks and bubbles that plague acrylic moulding are almost always drying problems, not moulding problems.
| Parameter | Recommendation |
|---|---|
| Drying temperature | 80 to 90 °C |
| Drying time | 3 to 4 hours |
| Dryer type | Desiccant dryer, not a hot-air oven |
| Handling | Keep material dry from dryer to feed throat |
| Verification | Measure moisture, do not assume the dryer did the job |
| Regrind | Re-dry, and limit regrind in optical parts |
| Symptom check | Silver streaks, bubbles or a hazy surface → check drying first |
The most common mistake is drying PMMA at ABS or PC temperatures, or for the wrong time. Too hot can soften and block the pellet flow in the dryer; too cool leaves the moisture in. Our guide to whether PMMA needs drying sets out the time, temperature and moisture limits in full, and it is worth reading before the first production run rather than after the first scrap bin.
The Processing Window
| Parameter | Typical range | Note |
|---|---|---|
| Melt temperature | 210 to 250 °C | Above this the material yellows and can degrade; below it, flow marks and stress |
| Mould temperature | 60 to 90 °C | Higher mould temperatures reduce internal stress and improve clarity |
| Injection speed | Moderate, slower through the gate | Fast fill shears the melt and creates flow marks and gate blush |
| Hold pressure | Moderate, with adequate time | Under-packing shows as sink and dimensional drift |
| Back pressure | Low | Excessive back pressure adds shear heat to a heat-sensitive material |
| Residence time | As short as practical | PMMA yellows with long dwell times; use the smallest suitable barrel |
| Shot size | 40 to 70 percent of barrel capacity | Avoid long residence in a large barrel |
| Regrind | Minimal; none in optical parts | Regrind brings contamination and thermal history with it |
| Purging | Polyethylene or dedicated purge compound | Never leave PMMA sitting hot |
PMMA wants to be moulded gently: moderate melt, warm mould, controlled fill, short residence. Everything that makes a part "cheap and fast" — high melt temperature, fast injection, long dwell — makes acrylic hazy, stressed or yellow.
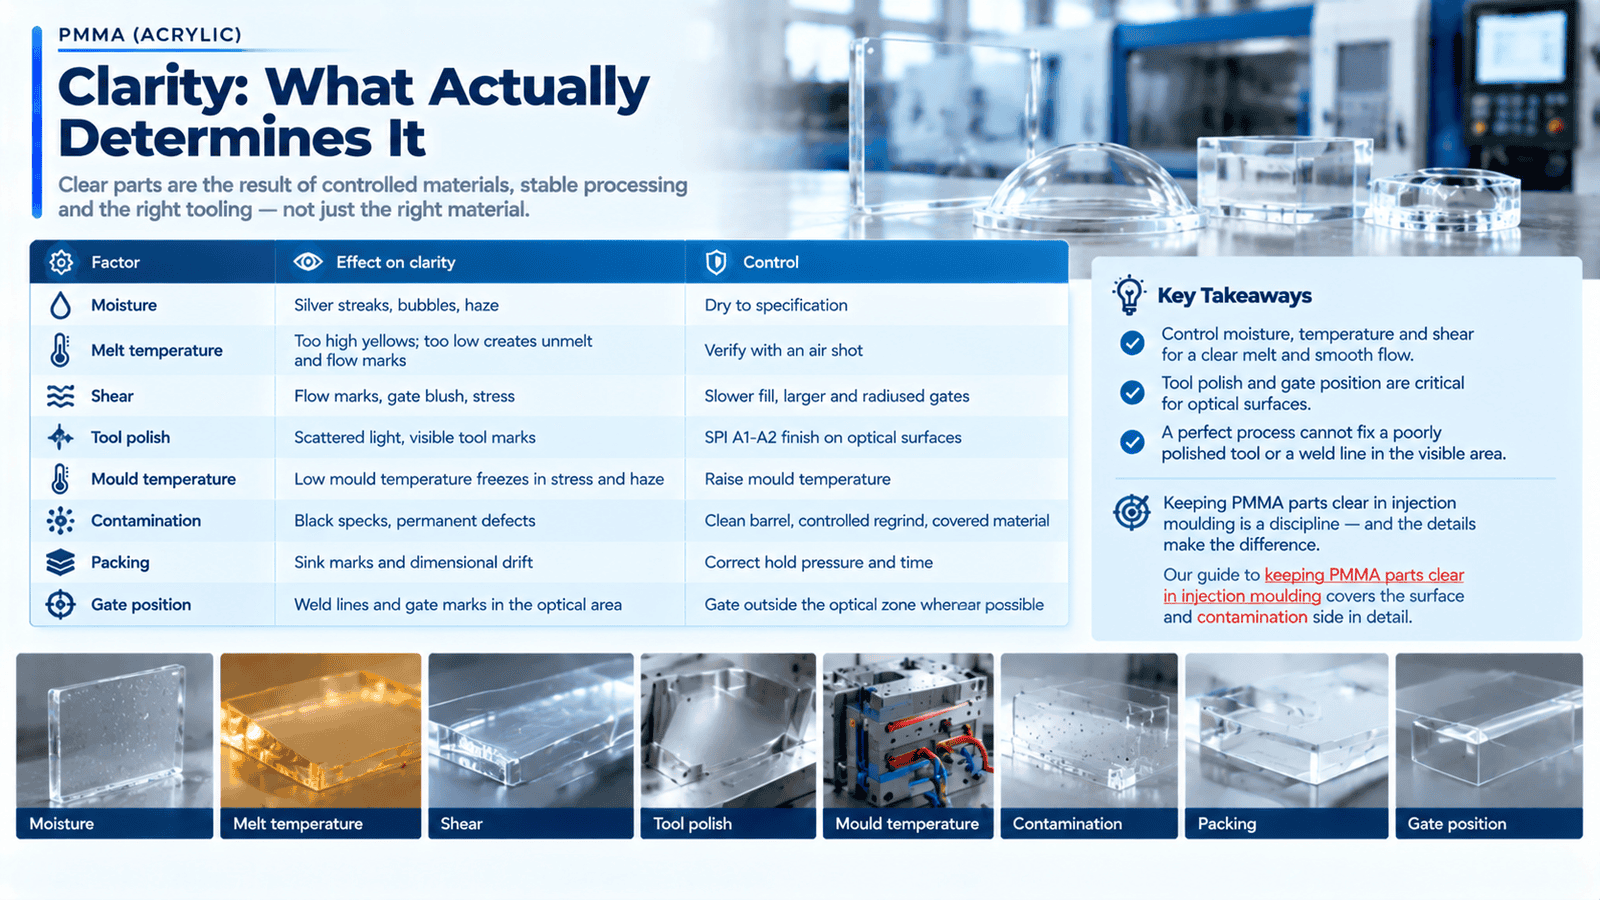
Clarity: What Actually Determines It
| Factor | Effect on clarity | Control |
|---|---|---|
| Moisture | Silver streaks, bubbles, haze | Dry to specification |
| Melt temperature | Too high yellows; too low creates unmelt and flow marks | Verify with an air shot |
| Shear | Flow marks, gate blush, stress | Slower fill, larger and radiused gates |
| Tool polish | Scattered light, visible tool marks | SPI A1-A2 finish on optical surfaces |
| Mould temperature | Low mould temperature freezes in stress and haze | Raise mould temperature |
| Contamination | Black specks, permanent defects | Clean barrel, controlled regrind, covered material |
| Packing | Sink marks and dimensional drift | Correct hold pressure and time |
| Gate position | Weld lines and gate marks in the optical area | Gate outside the optical zone wherever possible |
Keeping acrylic genuinely clear is a discipline in itself, and our guide to keeping PMMA parts clear in injection moulding works through the surface and contamination side of it. The two factors buyers underestimate are tool polish and gate position. A perfect process cannot rescue an optical surface polished to a cosmetic standard, and a weld line that forms inside the visible area is a permanent reject no matter how well the machine runs.
Common Defects and How to Fix Them
| Defect | Likely cause | Fix |
|---|---|---|
| Silver streaks | Moisture in the melt | Dry to specification, verify moisture |
| Bubbles | Moisture, or gas from degradation | Dry the material, lower melt temperature, check residence time |
| Flow marks | Cold melt, fast fill, small gate | Raise melt and mould temperature, slow the fill through the gate |
| Gate blush | Excess shear at the gate | Enlarge and radius the gate, slow injection through the gate |
| Weld lines | Low mould temperature, poor venting | Raise mould temperature, add venting at the weld location |
| Haze | Low mould temperature, moisture, tool polish | Raise mould temperature, verify drying, re-polish the tool |
| Yellowing | Overheating, long residence time | Lower melt temperature, reduce residence, smaller barrel |
| Sink marks | Insufficient packing in thick sections | Adjust hold profile, review wall thickness |
| Warpage | Uneven cooling, excessive packing | Balance cooling circuits, review hold pressure |
| Scratches and handling marks | Post-mould handling | Protect parts from ejection onward — acrylic marks easily |
| Cracking in service | Stress plus chemical exposure, or notch | Anneal where required, avoid sharp corners and solvent contact |
The diagnostic order matters: check drying first, melt temperature second, tool condition third. In acrylic, nine out of ten cosmetic rejects trace back to one of those three.
Tooling for Optical and Cosmetic Parts
| Tooling point | Requirement |
|---|---|
| Optical surface finish | SPI A1 or A2 polish, verified against a sample |
| Steel grade | Hardened, corrosion-resistant, capable of taking and holding a polish |
| Gate type | Direct or fan gate, generously sized; avoid small pin gates on optical parts |
| Gate position | Outside the visible or optical area wherever the geometry allows |
| Venting | Adequate and correctly placed, especially at weld line locations |
| Ejection | Generous ejection area and well-placed ejectors — acrylic marks under point loading |
| Cooling | Balanced circuits, with the ability to run the cavity warm |
| Draft | 1 to 2 degrees, more on textured faces |
| Inserts and slides | Avoid wherever possible; each one risks a witness mark |
A PMMA tool is a precision investment. Resin cost per part is modest; the tool polish and the process discipline are what the part is really paying for.
Shrinkage and Tolerances
| Grade | Typical shrinkage |
|---|---|
| General purpose PMMA | 0.3 to 0.6 percent |
| Impact modified | 0.4 to 0.7 percent |
| Glass filled (rare) | 0.1 to 0.3 percent |
PMMA is amorphous, so shrinkage is low and nearly uniform, and warpage is usually a cooling or packing problem rather than a material anisotropy problem. Two practical points:
- Measure after stabilisation. Optical parts are dimensionally checked after the part has cooled to room temperature, on a defined datum scheme.
- Tolerance and clarity interact. A part that has to be optically flat needs a stress-free moulding, which means a warm tool and a gentle filling profile — not the fastest cycle.
Design Rules for PMMA Parts
| Feature | Recommendation |
|---|---|
| Nominal wall | 2 to 4 mm; uniform, because thick sections sink and thin ones stress |
| Radii | Generous; PMMA is notch sensitive and cracks from sharp internal corners |
| Draft | 1 to 2 degrees minimum, more on textured surfaces |
| Ribs | 50 to 60 percent of nominal wall |
| Bosses | Radiused and ribbed; metal inserts for repeated assembly |
| Gates | Position outside visible areas; direct or fan gates for optical parts |
| Assembly | Solvent bonding, ultrasonic welding and mechanical fastening all work; avoid stress concentrators |
| Annealing | Consider for parts exposed to solvents or sustained load |
| Protective film | Apply before handling — scratches are the most common reject |
The design habit that saves the most acrylic parts is treating them as optical components from the first sketch: identify the visible area, keep gates and ejectors out of it, and design the surrounding structure so it does not load the clear region.
Secondary Operations
| Operation | What to know |
|---|---|
| Screen printing and IMD | Works well; the surface must be clean and consistent |
| Hard coating | Raises scratch resistance further; needs a controlled substrate surface |
| Laser cutting and machining | PMMA machines and polishes cleanly |
| Solvent bonding | Strong, clear joints — one of PMMA's real advantages |
| Annealing | Relieves moulded-in stress before coating or solvent exposure |
| Assembly with other plastics | Check solvent compatibility — stress cracking is the risk |
Our note on combining screen printing or IMD with PMMA covers the decoration route in detail, and it is the operation most lighting and appliance projects need to plan early.
Where PMMA Wins
- Lighting — lenses, light guides, diffusers, LED covers, where transmission and haze control matter
- Displays and covers — display windows, touch panels, instrument covers
- Automotive — headlamp and tail lamp lenses, interior light covers, decorative trim
- Medical and diagnostic — covers, cuvettes and transparent housings in compliant grades
- Cosmetic packaging — thick-wall clear caps and jars, where polish and clarity sell the product
- Signage and architectural — light boxes, signage faces, transparent panels
- Optical components — lenses and prisms where glass would be too heavy or too expensive
The application advantage of transparent moulded parts in lighting is worth reading alongside this guide — it covers how optical requirements translate into tooling and process decisions.
Quality Control for Optical Parts
| Check | What it involves |
|---|---|
| Light transmission | Measured on a spectrophotometer against the specification |
| Haze | Measured, not eyeballed — a "clear" part can carry several percent haze |
| Colour | Compared against an approved master under defined lighting |
| Dimensional | CMM or optical measurement after stabilisation |
| Cosmetic | Defined acceptance criteria agreed before production |
| Surface defects | Specks, flow marks and scratches judged against a signed master |
| Stress | Polarised inspection where the application is sensitive to stress |
| Traceability | Resin lot to production batch, retained for the agreed period |
Where the part is a lens rather than a window, the factors that let PMMA parts meet optical lens requirements set a tighter standard again. For optical parts, the acceptance criteria have to be written down and agreed before the first shot. "Clear" is not a specification; transmission, haze, colour and defect limits are.
Conclusion
PMMA is the material you choose when the part has to be seen through: 92 percent light transmission, excellent UV stability, good scratch resistance and a polish that no other mouldable plastic matches. It is also brittle, moisture sensitive and completely dependent on process discipline — the clarity you designed into the part is either delivered on every shot or lost to a wet pellet, an overheated melt or a tool polished to the wrong standard.
Three things decide whether a PMMA project succeeds: drying to specification, moulding inside a modest temperature window with a warm tool, and a tool built and polished for optical work. Get those right and acrylic is straightforward; get any of them wrong and every part in the bin looks the same — hazy, streaked or cracked.
With injection moulding capability from 80 to 1,400 tonnes, in-house tooling and controlled drying, process monitoring and optical inspection, we mould PMMA in general purpose, optical, impact modified, high-heat, UV-stabilised and light-diffusing grades. Through our custom injection moulding services we support transparent-part projects from material and grade selection through tool polishing, first article optical approval and volume production. Send us your drawing and the optical requirement — transmission, haze, colour and visible-area limits — to discuss grade, tooling and process.
FAQ
What is PMMA injection molding?
PMMA injection moulding is the production of parts from polymethyl methacrylate, the clearest common thermoplastic, with about 92 percent light transmission. It is used for lenses, light guides, display windows, automotive lamp lenses, medical covers and high-end cosmetic packaging — anywhere clarity, UV stability and scratch resistance matter more than impact strength.
Does PMMA need drying before moulding?
Yes, and drying is the most common cause of acrylic scrap. PMMA is normally dried at 80 to 90 °C for 3 to 4 hours in a desiccant dryer, and kept dry up to the feed throat. Moisture in the melt produces silver streaks, bubbles and haze. Drying at ABS or PC temperatures is a frequent and expensive mistake.
What temperature is used for PMMA injection moulding?
Melt temperature typically runs 210 to 250 °C with a mould temperature of 60 to 90 °C. Higher mould temperatures reduce internal stress and improve clarity; excessive melt temperature yellows the material and can degrade it. Injection speed should be moderate, with a slower fill through the gate to avoid shear marks.
Why is my acrylic part hazy instead of clear?
Haze in PMMA almost always comes from one of three causes: moisture in the material, a mould temperature that is too low (which freezes in stress and surface haze), or a tool polished below optical standard. Check drying and moisture first, then melt and mould temperature, then the tool finish. Contamination and excessive regrind are the next most common causes.
What is the shrinkage rate of PMMA?
General purpose PMMA shrinks about 0.3 to 0.6 percent, and impact-modified grades 0.4 to 0.7 percent. Because PMMA is amorphous, shrinkage is low and nearly uniform, so warpage is usually driven by cooling imbalance or packing rather than material anisotropy. Optical parts should be measured after the part has stabilised at room temperature.
Can PMMA be used instead of glass?
Often, yes. PMMA transmits about 92 percent of visible light, has a refractive index close to glass, weighs roughly half as much, and can be moulded into complex lens and light-guide geometry that glass cannot economically match. The limitations are heat resistance (80 to 100 °C heat deflection) and impact — PMMA is brittle, so glass remains the better choice for hot or heavily loaded applications.